I recently got ahold of Atari STF. It wouldn’t start, not even an LED, so it needed some work.
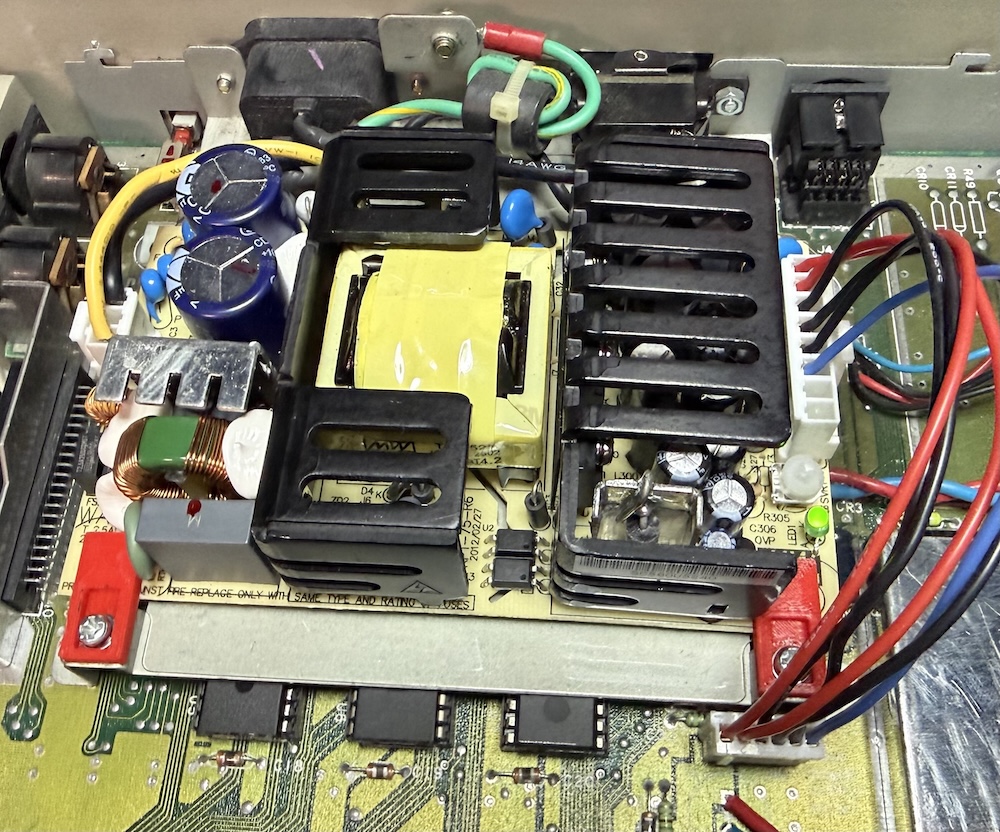
After opening the case and exposing the power supply – nothing looked suspicious (no blown caps). Then I proceeded to measuring the voltages. The power supply is a separate board with easy to remove header leading to the motherboard.
The voltages were measured at 5V on the red cables, and approximately 10v on the blue cable – but given that the ST adjusts voltages based on 5V rail, 10V (should be 12V) wasn’t the biggest concern.
Yet, still the machine wouldn’t budge, so the proper way to verify the PSU would be to test the PSU under load, but my focus went on the 120ohm resistance measured between 5V and ground.
I then proceeded to replace the two large axial decoupling capacitors (4600uF and 1000uF), suspecting a short, but the resistance didn’t change. Later I learned that 110-120ohm between 5V and GND is perfectly fine in this machine, so maybe it didn’t have anything to do with the caps.
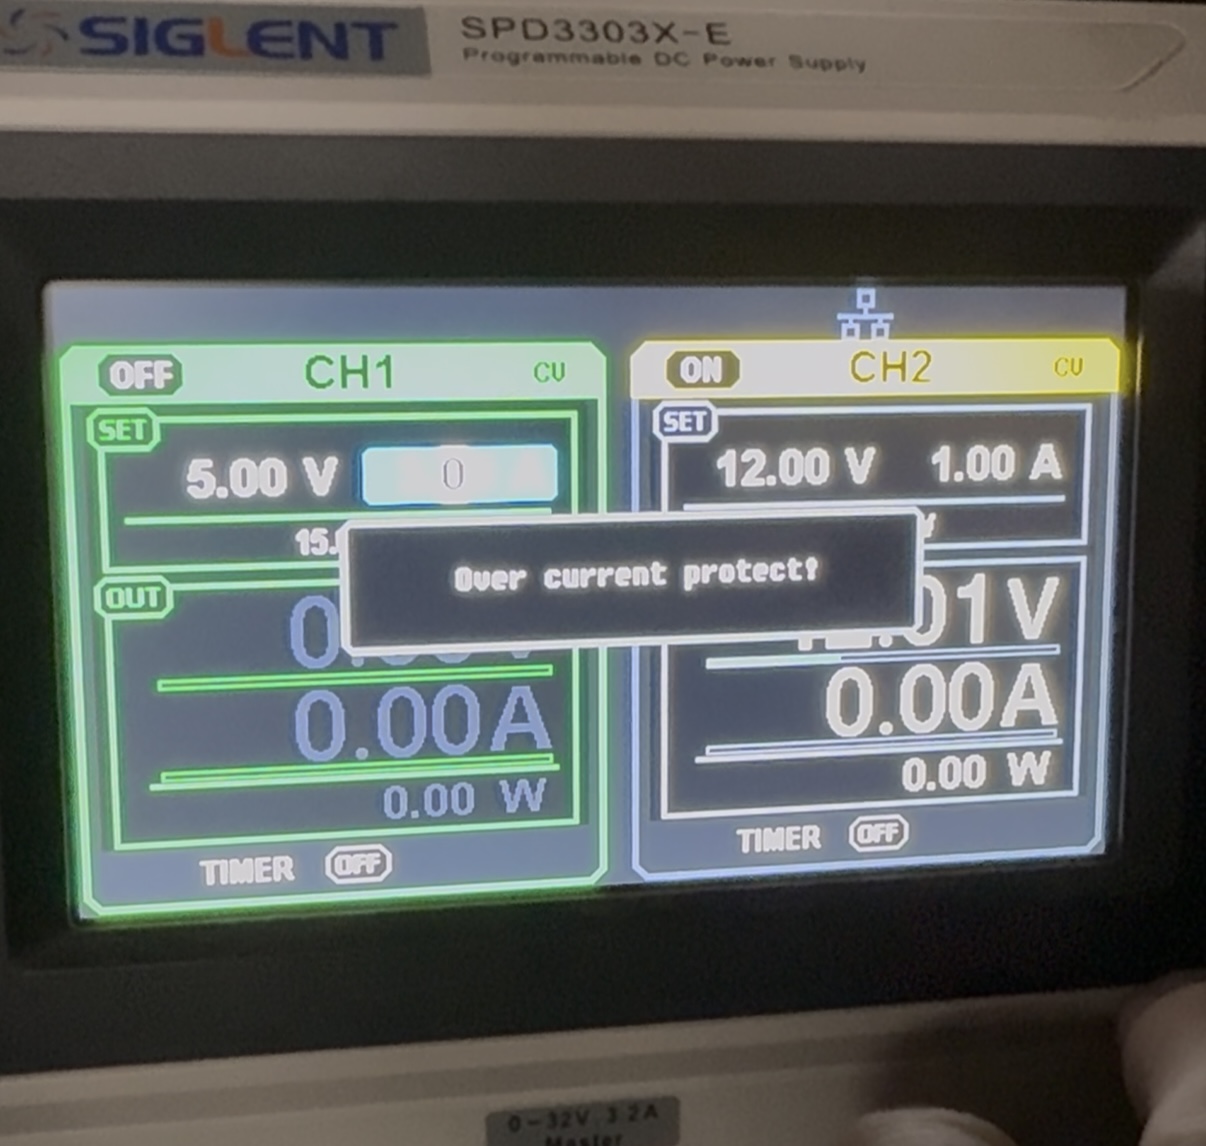
Rather than troubleshoot the power supply, I simply hooked up a bench power supply instead, and ironically, my higher-end lab power supply refused to work claiming overcurrent protection (that also fueled my suspicion of a short).

Then, I changed my strategy slightly and used a lower-end power supply that can deliver up to 5-6A instead of 3.2A, so I cobbled together both power supplies together, got 5V from the low-end one and 12V from the high-end one.
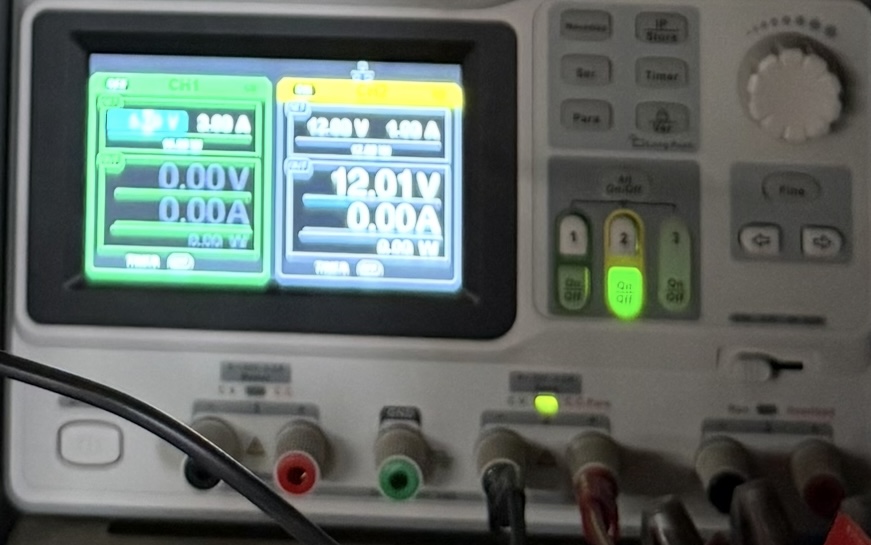
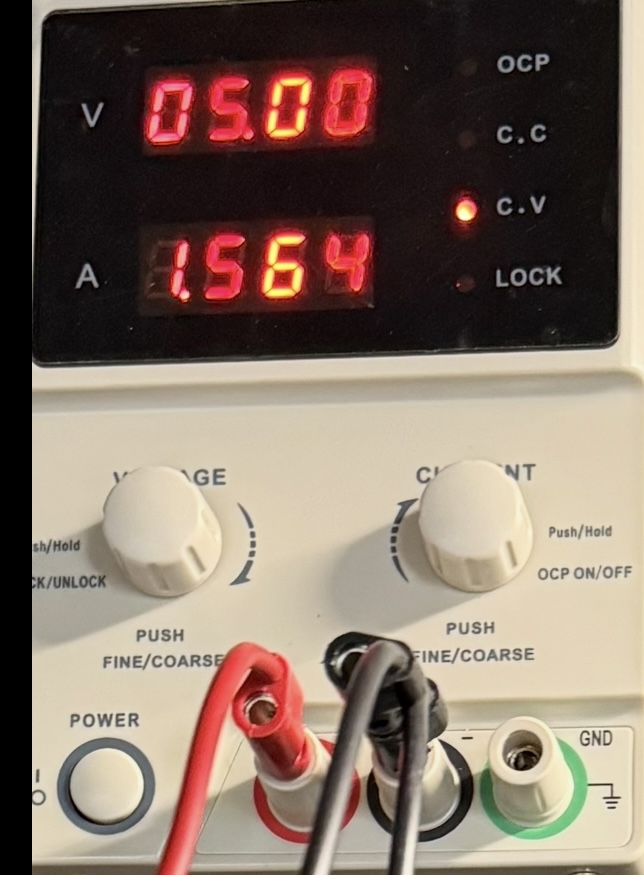
And, surprise, the machine booted as if nothing ever happened (also, it would only use about 1.5A power on 5V, so it really shouldn’t be tripping my other power supply).
At this point, I was certain that the original power supply went bad, and also that the machine has pretty significant power spike on boot, likely due to capacitors charging up that would briefly draw over 3.2A, tripping my sensitive high-end bench power supply.
For permanent fix, I ended up using a Mean Well 75A power supply that can supply 5V, 12V and -12V (I chose that one because with these voltages it can be used for most retro computers, except the ones that also need -5V).
It fits like a glove in the same spot, I even managed to reuse the original power supply mounting plate with the plastic isolation sheet underneath.
I ended up desoldering the yellow cable from the old power supply and a black cable from the power switch (it was too short to reach the new power supply).
After some crimping, I had the power supply working.
Quick voltage test, everything green, and then I proceeded to crimp the other connector.
Now was the time to mount everything permanently, I decided to gently pry the two upper mounting hole/tabs on the plate and slide the power supply underneath. The bottom mounting holes were raised and lined up perfectly flush with the power supply, so I 3d-printed two clips that would hold everything in place. The fit is just perfect. If I were to be extremely picky I’d print my tabs with a slightly different shape (maybe L-shape) to ensure they can’t rotate out of place.

The final result is a perfectly fitting power supply and a happy working Atari !

What I used to replace the power supply and crimp cables:
Mean Well RPT-75B – (RPT-60A also works, but they’re not available)
JST VHR-3N (CONN RCPT HSG 3POS 3.96MM)
JST VHR-8N (CONN RCPT HSG 8POS 3.96MM)
JST SVH-21T-P1.1 (CONN SOCKET 18-22AWG CRIMP TIN)
TE 171822-6 (CONN RCPT HSG 6POS 2.50MM)
TE 170262-1 (CONN SOCKET 20-26AWG CRIMP TIN)
I also used AWG16 wire to connect black connector to the power switch, and AWG20 wire to make the power-atari cable.