Quick debug and repair of TMK’s HHKB alternative controller

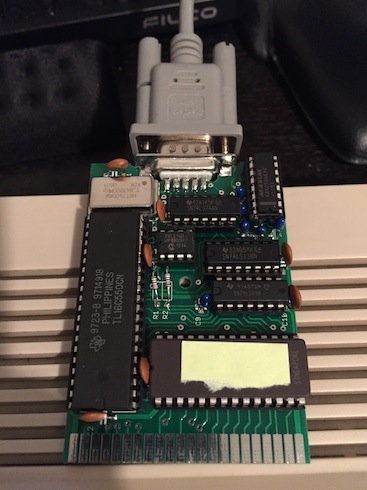
I ended up buying TMK’s (hasu) alternative controller board via Geekhack, and, to my surprise, it didn’t work.

The issue manifested itself in a rather weird way – keypresses would send random keys, sometimes even two at a time (but I knew that since it registered as a USB device and that atmega would properly enter DFU mode the micro itself was most likely just fine).

I’ve exchanged a few messages with hasu, we tried some software solutions including reverting a commit that might have been the culprit, meanwhile I’ve consulted the schematic and verified the cable and traces.

I knew that all the signals from the keyboard go directly to inputs of the atmega, and with a few pokes using my multimeter I found that pin 7 of the Hirose connector did not have connection to pin 25 of the Atmega. There war literally no path between them as if the PCB trace was bad.

Photo on 4-8-15 at 11.50 AM.jpg

Photo on 4-8-15 at 11.51 AM.jpg

Photo on 4-8-15 at 11.52 AM.jpg

Photo on 4-8-15 at 11.55 AM.jpg

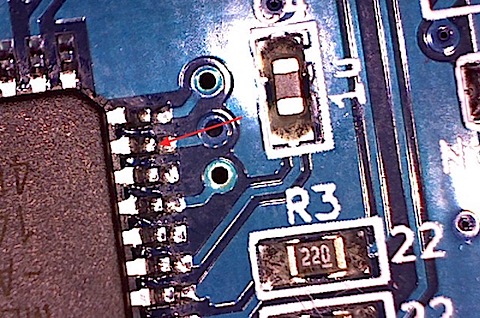
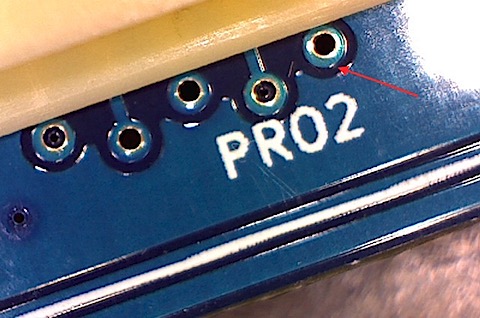
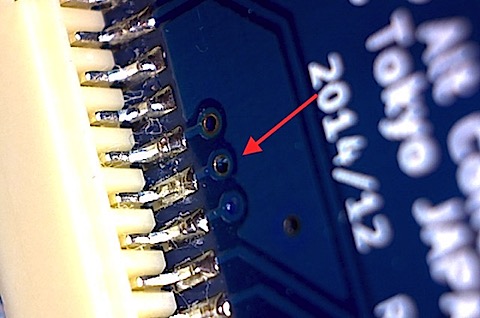
So I decided to make the connection temporarily with a probe and a wire – and the keyboard started to work, turns out that the solder somehow didn’t have good contact – which I couldn’t see even after inspecting the board visually several times.

YuLXR3N.png

Since it was just the solder – I’ve touched it up with my iron and voila – it was all fixed.

Hasu apologized for this, apparently this was the first time a board had such manufacturing issue.

Signed, Happy User of Happily Hacked Happy Hacking Keyboard ;)

FreePCB build – BusPirate

Finally got the PCB’s and built both of them, it was a great exercise in soldering, and eye test too, especially the SMT 0603 components.

It went pretty smoothly, one of the devices did not respond (but ftdi was visible over USB), quick test with shorted rx/tx demonstrated that ftdi was not at fault,

then quick trace verification showed that the rx pin on the PIC was lifted a tad (nearly not visible) and didn’t have contact, pushed it down, soldered, and voila – full success.

IMG_4203-copy1.jpg

Want a FreePCB ? – go to dangerousprototypes.com

Commodore 64 UART Cartridge

I’ve always been a big fan of serial ports, modems and especially computer-to-computer null-modem communication,

I wanted my Commodore 64 to be able to serve as a serial terminal, but the built-in serial port has extremely low speed.

I found this project, called UART Cartridge, and I knew this is it, of course those carts are not possible to buy, I had to make them myself, so I got to work.

I’ve ordered the PCB’s, all the parts (some still haven’t arrived so I had to find alternative source), and built the first cart already.

The result is amazing, the cart looks great and works really well as well.

IMG_3875.jpeg

I’ve been using my C64 on a Dell U2410 monitor over Composite cable, and the result wasn’t very good,

as much as games look okay scaled, the small very sharp font doesn’t stretch well, so I had to look for other solutions.

IMG_3873.jpeg

First, I tried Japan-made EntaVision S-Video->VGA converter, with mixed results, the font is more readable but somehow it doesn’t handle interlacing well and everything looks jittery.

IMG_3876.jpeg

Then, I tried “UP Empire SD-CSH1” S-Video -> HDMI converter and the result is much better, the font is very readable, although on my Monitor I can’t adjust the 720p/1080p picture to 4:3 aspect ratio, well, with such a small font it might be even better to keep it stretched – makes it even more readable.

IMG_3879-1.jpeg

The schematics and design was done by Dennis Kuschel, and are available on his website:

http://mycpu.selfhost.it/otherprojects/c64terminal/index.htm

I have enough parts to make a few more of those carts (and another part order pending), and will happily do so if you’re interested.

I would ship from Japan, it seems that worldwide shipping ranges between $4 and $8 depending on the speed.

Please contact me if you’d like to place an order (for tracking purposes I would recommend registering on my blog and placing a comment – also that other folks can see what is the demand).

Cost for a single unit : $40

Cost for 2-5 units: $35 each

Waiting time from placing an order to shipment – 2-4 weeks (although I will try to keep a small stock of ready-made carts or at least part sets for immediate assembly).

Please note that *your* cartridge may look different, due to supply of certain parts, some of them may be substituted for others.

The cartridges are fully tested on a PAL (EU) Commodore 64.

I have verified that the software itself works on an NTSC Commodore 64 with help of an emulator (VICE), there is no 100% guarantee that it will work on an actual NTSC C64 – and I will not accept returns should that be the case.

Back in business

After a very long period of slacking off in my camera endeavours, I’m back!

I expanded my camera collection quite a bit, so it’s time for pictures,

Voigtlander VITO II – Color-Skopar f/3.5 50mm,

Kodak Tri-x 400 shot at 1600, stand-developed in Rodinal 1:100 for 2 hours.

vitoScan-141003-0003.jpg

vitoScan-141004-0002.jpg

vitoScan-141004-0006.jpg